
使用packstack安装openstack
【实验目标】
使得学员能熟练通过packstack安装openstack pike版本,并注意安装过程中一些要点。
对应视频地址 点击观看>>
【实验环境】
|
虚拟机版本 |
系统 |
网络配置 |
|
Vmware workstation 14 |
Centos7.4 |
192.168.26.100/24 |
【实验步骤】
[root@osp1 ~]# hostnamectl set-hostname osp1.rhce.cc
[root@osp1 ~]# echo '192.168.26.100 osp1.rhce.cc osp1' >> /etc/hosts
[root@osp1 ~]# cat /etc/hosts
127.0.0.1 localhost localhost.localdomain localhost4 localhost4.localdomain4
::1 localhost localhost.localdomain localhost6 localhost6.localdomain6
192.168.26.100 osp1.rhce.cc osp1
[root@osp1 ~]#
关闭防火墙
[root@osp1 ~]# firewall-cmd --set-default-zone=trusted
success
[root@osp1 ~]#
关闭selinux
[root@osp1 ~]# sed -i '/SELINUX=/cSELINUX=disabled' /etc/sysconfig/selinux
[root@osp1 ~]# setenforce 0
[root@osp1 ~]#
[root@osp1 ~]# yum install wget -y
已加载插件:fastestmirror
base | 3.6 kB 00:00:00
extras | 3.4 kB 00:00:00
updates | 3.4 kB 00:00:00
(1/4): base/7/x86_64/group_gz | 166 kB 00:00:00
(2/4): extras/7/x86_64/primary_db | 147 kB 00:00:00
(3/4): updates/7/x86_64/primary_db
....
已安装:
wget.x86_64 0:1.14-15.el7_4.1
完毕!
[root@osp1 ~]#
配置yum源
[root@osp1 ~]# cd /etc/yum.repos.d/
[root@osp1 yum.repos.d]# rm -rf *
[root@osp1 yum.repos.d]# wget ftp://ftp.rhce.cc/pike/*
--2018-06-06 17:44:56-- ftp://ftp.rhce.cc/pike/*
=> “.listing”
正在解析主机 ftp.rhce.cc (ftp.rhce.cc)... 222.186.32.124
正在连接 ftp.rhce.cc (ftp.rhce.cc)|222.186.32.124|:21... 已连接。
正在以 anonymous 登录 ... 登录成功!
==> SYST ... 完成。 ==> PWD ... 完成。
==> TYPE I ... 完成。 ==> CWD (1) /pike ... 完成。
==> PASV ... 完成。 ==> LIST ... 完成。
.......
2018-06-06 17:44:56 (3.11 MB/s) - “epel.repo” 已保存 [923]
[root@osp1 yum.repos.d]#
[root@osp1 yum.repos.d]# ls
Aliyun-pike.repo CentOS-Base.repo epel.repo
[root@osp1 yum.repos.d]#
清除yum缓存
[root@osp1 ~]# yum clean all
已加载插件:fastestmirror
正在清理软件源: Aliyun-pike Aliyun-qemu-ev base epel extras updates
Cleaning up everything
Maybe you want: rm -rf /var/cache/yum, to also free up space taken by orphaned data from disabled or removed repos
Cleaning up list of fastest mirrors
[root@osp1 ~]#
安装常用包:
[root@osp1 ~]# yum install bash* vim -y
已加载插件:fastestmirror
Aliyun-pike | 2.9 kB 00:00:00
Aliyun-qemu-ev | 2.9 kB 00:00:0
....
更新完毕:
bash.x86_64 0:4.2.46-30.el7
作为依赖被升级:
bind-libs-lite.x86_64 32:9.9.4-61.el7 bind-license.noarch 32:9.9.4-61.el7 kpartx.x86_64 0:0.4.9-119.el7
systemd.x86_64 0:219-57.el7 systemd-libs.x86_64 0:219-57.el7 systemd-sysv.x86_64 0:219-57.el7
完毕!
[root@osp1 ~]#
更新系统并重启系统
[root@osp1 ~]# yum update -y
....
替代:
grub2.x86_64 1:2.02-0.64.el7.centos grub2-tools.x86_64 1:2.02-0.64.el7.centos
完毕!
[root@osp1 ~]# reboot
安装packstack
[root@osp1 ~]# yum install openstack-packstack -y
已加载插件:fastestmirror
Loading mirror speeds from cached hostfile
正在解决依赖关系
--> 正在检查事务
---> 软件包 openstack-packstack.noarch.1.11.0.1-1.el7 将被 安装
--> 正在处理依赖关系 openstack-packstack-puppet = 1:11.0.1-1.el7,它被软件包 1:openstack-packstack-11.0.1-1.el7.noarch 需要
--> 正在处理依赖关系 pyOpenSSL >= 16.2.0,它被软件包 1:openstack-packstack-11.0.1-1.el7.noarch 需要
--> 正在处理依赖关系 python-setuptools,它被软件包 1:openstack-packstack-11.0.1-1.el7.noarch 需要
.....
rubygem-bigdecimal.x86_64 0:1.2.0-33.el7_4 rubygem-io-console.x86_64 0:0.4.2-33.el7_4
rubygem-json.x86_64 0:1.7.7-33.el7_4 rubygem-psych.x86_64 0:2.0.0-33.el7_4
rubygem-rdoc.noarch 0:4.0.0-33.el7_4 rubygem-rgen.noarch 0:0.6.6-2.el7
rubygems.noarch 0:2.0.14.1-33.el7_4
完毕!
[root@osp1 ~]#
生成应答文件:
[root@osp1 ~]# packstack --gen-answer-file=aa.txt
Packstack changed given value to required value /root/.ssh/id_rsa.pub
[root@osp1 ~]#
依次执行下面的命令
sed -i '/^CONFIG_PROVISION_DEMO=/cCONFIG_PROVISION_DEMO=n' aa.txt
sed -i '/^CONFIG_NEUTRON_ML2_TYPE_DRIVERS=/cCONFIG_NEUTRON_ML2_TYPE_DRIVERS=flat,vxlan' aa.txt
sed -i '/^CONFIG_NEUTRON_ML2_FLAT_NETWORKS=/cCONFIG_NEUTRON_ML2_FLAT_NETWORKS=datacentre' aa.txt
sed -i '/^CONFIG_NEUTRON_OVS_BRIDGE_MAPPINGS=/cCONFIG_NEUTRON_OVS_BRIDGE_MAPPINGS=datacentre:br-ex' aa.txt
sed -i.bak -r 's/(.+_PW)=[0-9a-z]+/\1=redhat/g' aa.txt
运行packstack安装openstack
[root@osp1 ~]# packstack --answer-file=aa.txt
Welcome to the Packstack setup utility
The installation log file is available at: /var/tmp/packstack/20180606-175844-yAl9Vy/openstack-setup.log
Installing:
Clean Up [ DONE ]
Discovering ip protocol version [ DONE ]
Setting up ssh keys [ DONE ]
Preparing servers [ DONE ]
Pre installing Puppet and discovering hosts' details [ DONE ]
Preparing pre-install entries [ DONE ]
Setting up CACERT [ DONE ]
Preparing AMQP entries [ DONE ]
Preparing MariaDB entries [ DONE ]
Fixing Keystone LDAP config parameters to be undef if empty[ DONE ]
Preparing Keystone entries [ DONE ]
Preparing Glance entries [ DONE ]
Checking if the Cinder server has a cinder-volumes vg[ DONE ]
Preparing Cinder entries [ DONE ]
Preparing Nova API entries [ DONE ]
Creating ssh keys for Nova migration [ DONE ]
Gathering ssh host keys for Nova migration [ DONE ]
Preparing Nova Compute entries [ DONE ]
Preparing Nova Scheduler entries [ DONE ]
Preparing Nova VNC Proxy entries [ DONE ]
Preparing OpenStack Network-related Nova entries [ DONE ]
Preparing Nova Common entries [ DONE ]
Preparing Neutron LBaaS Agent entries [ DONE ]
Preparing Neutron API entries [ DONE ]
Preparing Neutron L3 entries [ DONE ]
Preparing Neutron L2 Agent entries [ DONE ]
Preparing Neutron DHCP Agent entries [ DONE ]
Preparing Neutron Metering Agent entries [ DONE ]
Checking if NetworkManager is enabled and running [ DONE ]
Preparing OpenStack Client entries [ DONE ]
Preparing Horizon entries [ DONE ]
Preparing Swift builder entries [ DONE ]
Preparing Swift proxy entries [ DONE ]
Preparing Swift storage entries [ DONE ]
Preparing Gnocchi entries [ DONE ]
Preparing Redis entries [ DONE ]
Preparing Ceilometer entries [ DONE ]
Preparing Aodh entries [ DONE ]
Preparing Puppet manifests [ DONE ]
Copying Puppet modules and manifests [ DONE ]
Applying 192.168.26.100_controller.pp
Testing if puppet apply is finished: 192.168.26.100_controller.pp [ - ]
---此处时间较久,请耐心等待
.....
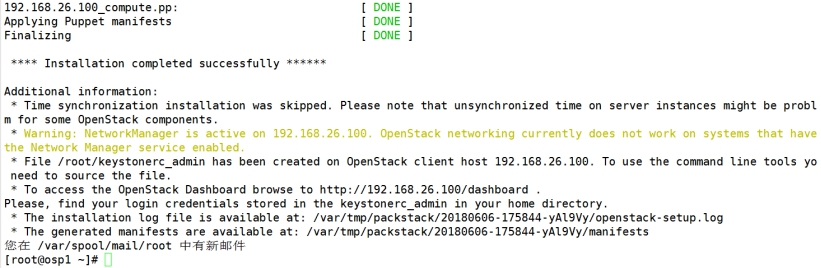

上面黄色字体提示没有关闭NetworkManager,现在关闭:
[root@osp1 ~]# systemctl stop NetworkManager
[root@osp1 ~]# systemctl disable NetworkManager
Removed symlink /etc/systemd/system/multi-user.target.wants/NetworkManager.service.
Removed symlink /etc/systemd/system/dbus-org.freedesktop.NetworkManager.service.
Removed symlink /etc/systemd/system/dbus-org.freedesktop.nm-dispatcher.service.
[root@osp1 ~]#
登录openstack:
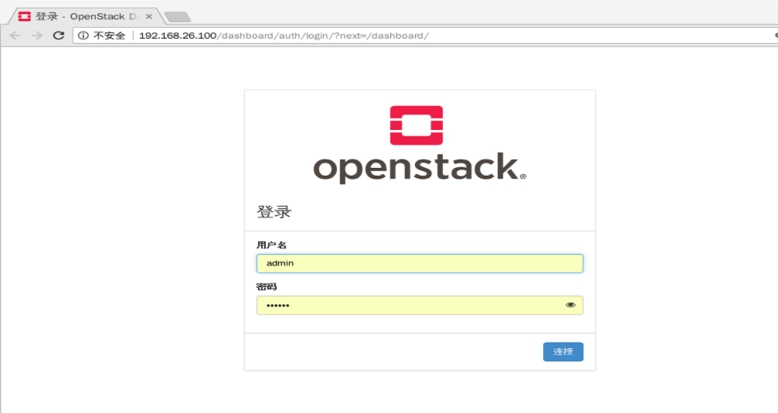
至此,openstack安装完成。
